Monthly Archives: April 2019

App Settings File

Your app can use multiple canvases or register multiple webhooks. Each resource can have different properties, and they must be described using the settings file. The settings file is similar to a manifest file used in other languages/frameworks and follows a JSON format.

App settings file found on the admin dashboard under ‘Apps –> Develop –> Your app’

On this page

File format

In the example below, we have specified that we’d like the app to add a canvas on the admin dashboard’s main menu, and listen to a webhook that is fired every time a user cancels a booking:

{
  "canvases": [
      {
        "type":"ADMIN_MAIN_MENU",
        "url": "https://api.optixapp.com/canvas-placeholder",
        "title":"My app interface",
        "icon":"exporter"
      }
    ],
"webhooks": [
      {
        "event": "member_booking_cancelled", 
        "url": "https://example.com/webhook/listener"
     }
   ]
}

The file itself is an object with two top-level keys (“canvases” and “webhooks”), both of which are optional, and their values are arrays of corresponding objects.

Canvases

The canvas object has three primary keys, plus specific options (like title, icon, height):

  1. “type”: The type of canvas. Required.
  2. “url”: The target URL for the canvas. Required.
  3. “identification”: Field that identifies the canvas between other canvases. Optional if you don’t have two or more canvases using the same type.

To view the available canvas types and options, visit the Canvas lists for the mobile app and admin dashboard.

The canvas URL is manipulated before being introduced into the interface. To enable contextual experiences, Optix adds an authentication token that can be used by the canvas to retrieve user/organization-wide data.

If you don’t provide a “macro” to be replaced, the canvas system appends the variable “token” to the query parameter list of the URL.

Using macro replacements

Macros can be defined to customize the URL generation. With macros, you can change the request variables, repeat information, and also use fragment variables.

Example 1:
If you provide “https://example.com/mypage”, the Optix system opens the link “https://example.com/mypage?token=thepersonaltokengenerated”

If you want to change the URL to use a specific format, you can use macroses, like “{token}.”

Example 2:
If you provide “https://example.com/mypage?mytoken={token}” the Optix system opens the link “https://example.com/mypage?mytoken=thepersonaltokengenerated”

You can also use the macro as part of the URL path or a fragment.

Example 3:
If you provide “https://example.com/mypage/{token}/show” the Optix system opens the link “https://example.com/mypage/thepersonaltokengenerated/show”

Example 4:
If you provide “https://example.com/mypage?anyother=var#mytoken={token}” the Optix system opens the link “https://example.com/mypage?anyother=var#mytoken=thepersonaltokengenerated”

If your canvas application backend does not require the token, we support the use of tokens in the URL fragment (example 4) for security purposes. In this case, the token is never sent to the backend.

Macros list

Variable name/Canvastokenlocation_id(other fields)
MOBILE_HOME_SECTION
MOBILE_HOME_PRIMARY
MOBILE_TAB_BAR_ITEM
MOBILE_MORE_SCREEN
ADMIN_APP_SETTINGS
ADMIN_MAIN_MENU
Variable name/Canvastokenlocation_id(other fields)
MOBILE_HOME_SECTION
MOBILE_HOME_PRIMARY
MOBILE_TAB_BAR_ITEM
MOBILE_BOOKING_ACTIVE_TRAY*booking_id
MOBILE_BOOKING_CONFIRMATION*booking_id
MOBILE_BOOKING_DETAILS*booking_id
MOBILE_MORE_SCREEN
MOBILE_MODAL*
ADMIN_APP_SETTINGS
ADMIN_MAIN_MENU
ADMIN_MODAL*
ADMIN_USERS_TAB*
ADMIN_BOOKINGS_TAB*
ADMIN_COMMUNITY_TAB*
ADMIN_PLAN*plan_id
ADMIN_RESOURCE*resource_id
ADMIN_USER_SIDEPANEL*user_id
ADMIN_TEAM_SIDEPANEL*team_id
ADMIN_BOOKING_CONFIRMATION*booking_id

* Not currently available

Webhooks

The webhook object has 2 required keys:

  • “event”: The event name.
  • “URL”: The target URL for the webhook. Your URL can contain GET parameters.

Check the webhook list to see all available events and data.

Got questions?

We are here to help. Ask us a question and we’ll do our best to answer as soon as possible.

Contact Us

Admin Dashboard Canvases

These canvases display in the web-based Optix admin dashboard and are used to create experiences for admins. To use the canvases in your app, you need to specify them in your app settings file.

On this page

1. App settings

This canvas could be used to display all of the global configuration UI that your app needs (e.g., dropdown select boxes with settings or an OAuth flow to get integrations connected). It opens when a user clicks the Configure button on the Apps → Manage apps menu item.

JSON type

ADMIN_APP_SETTINGS

Settings file example

Learn more about using this in the app settings file section.

{  
   "canvases": [  
      {  
         "type": "ADMIN_APP_SETTINGS",
         "url": "https://api.optixapp.com/canvas-placeholder",
         "title": "My app interface"
      }
   ]
}


Placement in admin dashboard

The admin dashboard displaying a full-screen canvas for an app’s settings.

  1. title
  2. url (loaded in an iframe)


Example app

2. Main menu item

This canvas is displayed in a section much like the other core features. It is accessed from the main left menu.

JSON type

ADMIN_MAIN_MENU

Settings file example

Learn more about using this in the app settings file section.

{  
   "canvases": [  
      {  
         "type": "ADMIN_MAIN_MENU",
         "url": "https://api.optixapp.com/canvas-placeholder",
         "title": "My app interface",
         "icon": "unlock"
      }
   ]
}


Placement in admin dashboard

The app home screen with a custom ‘section’ (on the left), and a full-screen canvas opening when the ‘secondary title’ is tapped (on the right).

  1. icon (you can find the available icons here)
  2. title
  3. url (loaded in an iframe)
  4. admin_role (“OWNER”, “MANAGER”, “CLIENT_SERVICE”, or “RECEPTION”)

3. Invoice options menu

This can be used to present a pop-up modal when an admin selects one or more invoices in the invoice list, then clicks on ‘options.’ Setting up this canvas will add your item to the menu that opens, and will display a canvas in a modal when that option is clicked.

JSON type

ADMIN_MODAL_INVOICES_MENU

Settings file example

Learn more about using this in the app settings file section.

{  
   "canvases": [  
      {  
         "type": "ADMIN_MODAL_INVOICES_MENU",
         "url": "https://api.optixapp.com/canvas-placeholder",
         "title": "My app interface"
      }
   ]
}


Placement in the admin dashboard

The admin dashboard showing the options menu for a selected invoice (above) and the modal open after the custom menu option is clicked.

  1. title
  2. title (inherited from #1)
  3. url (loaded in an iframe)


Example app

Got questions?

We are here to help. Ask us a question and we’ll do our best to answer as soon as possible.

Contact Us

Mobile App Canvases

These canvases display in the iOS and Android Optix mobile apps. To use the canvases in your app, you need to specify them in your app settings file.

On this page

1. Home screen primary action

This canvas can be used to add a primary action to the top group found on the home screen. The supporting content is used to construct the primary action card, which opens a full-screen canvas when tapped.

JSON type

MOBILE_HOME_PRIMARY

Settings file example

Learn more about using this in the app settings file section.

{  
   "canvases": [  
      {  
         "type": "MOBILE_HOME_PRIMARY",
         "url": "https://api.optixapp.com/canvas-placeholder",
         "title": "My app interface",
         "icon": "exporter"
      }
   ]
}


Placement in app

The app home screen with a custom ‘primary action’ (on the left), and a full-screen canvas opening when that primary action is tapped (on the right).

  1. icon (you can find the available icons here)
  2. title
  3. title (inherited from #2)
  4. url (loaded in a webview)


Example app

2. Home screen section

This canvas appears in the main content of the mobile app home screen. It gets a title and one or more web views in the home screen. It is used to add content or actions to the home screen (e.g., blogs, essential information, access control, or surveys). Additionally and optionally, a secondary action that loads a full-screen canvas when tapped can be specified. The secondary action would be useful when the primary canvas is showing a subset of the UI, and a ‘See all’ reveals the full version.

Important

This canvas is different from other canvases. It requires a JSON object to be specified for each ‘item’, and another to group them together. This example will show how three items are grouped.

JSON types

MOBILE_HOME_SECTION (to group the items)

MOBILE_HOME_SECTION_ITEM (for each item to be displayed in a web view)

Settings file example

Learn more about using this in the app settings file section.

{

"canvases": [

		{
			"type":"MOBILE_HOME_SECTION",
			"title":"Section title",
			"subtitle":"My subtitle",
			"secondary_title":"See all",
			"secondary_url":"https://api.optixapp.com/canvas-placeholder",
			"height":"300",
			"items": [
				"article-happy-springs1",
				"article-happy-springs2",
				"article-happy-springs3"
			],
			"show_at_top": true
		},
		{
			"type":"MOBILE_HOME_SECTION_ITEM",
			"url": "https://api.optixapp.com/canvas-placeholder",
			"title":"Title 1",
			"identification": "article-happy-springs1"
		},

		{
			"type":"MOBILE_HOME_SECTION_ITEM",
			"url": "https://api.optixapp.com/canvas-placeholder",
			"title":"Title 2",
			"identification": "article-happy-springs2"
		},

		{
			"type":"MOBILE_HOME_SECTION_ITEM",
			"url": "https://api.optixapp.com/canvas-placeholder",
			"title":"Title 3",
			"identification": "article-happy-springs3"
		}
	]
}

Notes

  • The maximum height is 400 (the unit is ‘dp,’ you can consider them to be pixels relative to a 1x resolution screen).
  • You must specify at least one (and a maximum of six) MOBILE_HOME_SECTION_ITEM for a MOBILE_HOME_SECTION.

Placement in app

The app home screen with a custom ‘section’ (on the left), and a full-screen canvas opening when the ‘secondary title’ is tapped (on the right).

  1. title
  2. first item’s url (loaded in a webview)
  3. secondary title
  4. second item’s url (loaded in a webview)
  5. title (inherited from #1 above)
  6. secondary url (loaded in a webview)
  7. show at top


Example app

3. Tab bar item

This can be used to add a whole new tab to the mobile apps. The tab title is shown at the top along with the venue picker and messaging icon (to maintain consistency). This could be used to add a primary section considered very important by the admin (e.g., door locks, events or food ordering).

JSON type

MOBILE_TAB_BAR_ITEM

Settings file example

Learn more about using this in the app settings file section.

{  
   "canvases": [  
      {  
         "type": "MOBILE_TAB_BAR_ITEM",
         "url": "https://api.optixapp.com/canvas-placeholder",
         "title": "My app interface",
         "icon": "unlock",
         "lock_header": false
      }
   ]
}

Notes

  • lock_header is a true/false flag that instructs the mobile app to fix the header section in place or not. When it is not fixed, certain web content that relies on browser height may not function as desired. In this case, you can enable lock_header.

Placement in app

The app displaying a custom tab.

  1. title
  2. url (loaded in a webview)
  3. icon (you can find the available icons here)


Example app

4. More screen item

This can be used to create additional items in the more screen. This item opens a full-screen canvas when tapped.

JSON type

MOBILE_MORE_SCREEN

Settings file example

Learn more about using this in the app settings file section.

{  
   "canvases": [  
      {  
         "type": "MOBILE_MORE_SCREEN",
         "url": "https://api.optixapp.com/canvas-placeholder",
         "title": "My app interface"
      }
   ]
}


Placement in app

The app more screen with a custom ‘more screen item’ (on the left), and a full-screen canvas opening when it is tapped (on the right).

  1. title
  2. title (inherited from #1 above)
  3. url (loaded in a webview)

Got questions?

We are here to help. Ask us a question and we’ll do our best to answer as soon as possible.

Contact Us

Webhooks Debugger Tool

The Webhook debugger tool provides an interface for you to see the webhooks triggered from the Optix platform. It displays the payload and delivery status for each webhook.

On this page

Using the tool

This tool only shows webhooks triggered at the Optix Organization where the app was created (in Apps → Develop). Webhooks triggered at other organizations are not visible for you. This tool is available on the ‘Develop’ page, under the personal token ⋮ menu.

Webhook debugger demo

This live demo shows what you can expect from the Webhook debugger:

Got questions?

We are here to help. Ask us a question and we’ll do our best to answer as soon as possible.

Contact Us

Webhooks List

This page includes a complete list of webhooks. Learn more about subscribing to webhooks here.

On this page

Available webhooks

This table shows the name of the webhook, as well as the fields you can expect:

Webhook ↓Example response

app_install

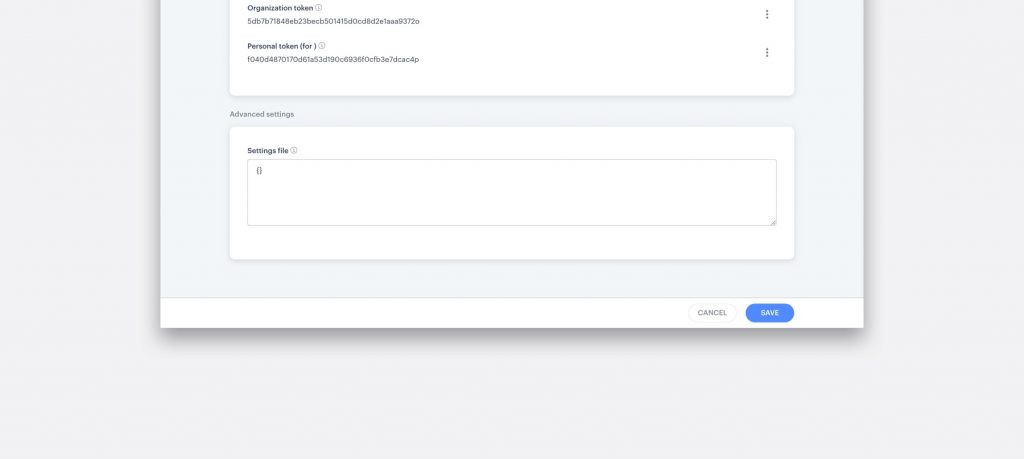
Triggers when a user installs/creates a new app or the organization token is updated.

{
  "organization_token": "5c26d23356…3960870bfo",
  "client_id": "ce81e1fbf3d7…ba561d5d",
  "created_timestamp": 1545092451,
  "organization_id": 3568,
  "event": "app_install",
  "request_signature": "1207e01d133aa…4329c48ff0f"
}

app_uninstall

Triggers when a user uninstalls or deletes an app.

{
  "client_id": "ce81e1fbf3d73…0ba561d5d",
  "created_timestamp": 1545092451,
  "organization_id": 3568,
  "event": "app_uninstall",
  "request_signature": "1207e01d133aa…a4329c48ff0f"
}

assignment_ended

Triggers when an assignment status transitions from ’active’ to ’ended’ or an assignment is created with an end date in the past.

{
  "assignment_id": 102,
  "resource_id": 8850,
  "resource_name": "Bike room",
  "resource_type": "Meeting Room",
  "owner_account_id": 1700,
  "owner_type": "User",
  "owner_name": "Richard Johnson",
  "owner_email": "example@example.com",
  "payer_account_id": 1701,
  "payer_type": "Team",
  "payer_name": "The Cube Team",
  "payer_email": "example@example.com",
  "start_timestamp": 1620057600,
  "start_datetime": "2021-05-03 09:00",
  "end_timestamp": 1621036800,
  "end_datetime": "2021-05-14 17:00",
  "days_of_week": "Mon-Wed, Fri",
  "time_of_day": "9am - 5pm",
  "status": "Ended",
  "notes": "Admin notes",
  "created_unix_timestamp": 1618448141,
  "created_datetime": "2021-04-14 17:55",
  "client_id": "ce81e1fbf3d7…ba561d5d",
  "created_timestamp": 1545092451,
  "organization_id": 3568,
  "event": "assignment_ended",
  "request_signature": "1207e01d133aa…4329c48ff0f"
}

assignment_started

Triggers when an assignment status transitions from ’upcoming’ to ’active’ or an active assignment is created.

{
  "assignment_id": 102,
  "resource_id": 8850,
  "resource_name": "Bike room",
  "resource_type": "Meeting Room",
  "owner_account_id": 1700,
  "owner_type": "User",
  "owner_name": "Richard Johnson",
  "owner_email": "example@example.com",
  "payer_account_id": 1701,
  "payer_type": "Team",
  "payer_name": "The Cube Team",
  "payer_email": "example@example.com",
  "start_timestamp": 1620057600,
  "start_datetime": "2021-05-03 09:00",
  "end_timestamp": 1621036800,
  "end_datetime": "2021-05-14 17:00",
  "days_of_week": "Mon-Wed, Fri",
  "time_of_day": "9am - 5pm",
  "status": "Active",
  "notes": "Admin notes",
  "created_unix_timestamp": 1618448141,
  "created_datetime": "2021-04-14 17:55",
  "client_id": "ce81e1fbf3d7…ba561d5d",
  "created_timestamp": 1545092451,
  "organization_id": 3568,
  "event": "assignment_started",
  "request_signature": "1207e01d133aa…4329c48ff0f"
}

cancel_checkin

Triggers when a checkin is canceled.

{
  "checkin_id": "5074",
  "location_name": "Vancouver Location",
  "location_timezone": "America/Vancouver",
  "check_in_timestamp": "1558987200",
  "check_in_datetime": "2019-05-27 20:00",
  "member_name": "Jean",
  "member_last_name": "Example",
  "member_full_name": "Jean Example",
  "member_email": "example@example.com",
  "created_datetime": "2019-05-27 17:20",
  "client_id": "7d5ee091717b8eb6461…a1ab1a508",
  "created_timestamp": 1558977616,
  "organization_id": "6267",
  "event": "cancel_checkin",
  "request_signature": "89e2f8ccca2d5…478888e7c5c2"
}

cancel_plan_subscription

Triggers when a user or team plan subscription is canceled or ended.

{
  "plan_template_id": "916",
  "plan_template_name": "Plan A",
  "account_plan_id": "29191",
  "name": "Plan A for Jean",
  "status": "ACTIVE",
  "subscription_type": "member",
  "created_datetime": "2019-05-27 17:25",
  "start_datetime": "2019-05-27 00:00",
  "created_unix_timestamp": 1558977946,
  "start_unix_timestamp": 1558915200,
  "price": "300.00",
  "deposit": "50.00",
  "set_up_fee": "10.00",
  "free_trial_days": "7",
  "subscribers": [
    {
      "user_name": "Jean",
      "user_last_name": "Example",
      "user_fullname": "Jean Example",
      "email": "example@example.com"
    }
  ],
  "client_id": "7d5ee091717…ab1a508",
  "created_timestamp": 1558977946,
  "organization_id": "6267",
  "event": "cancel_plan_subscription",
  "request_signature": "db2fdf29744b…d5d61dfed00"
}

invoice_paid

Triggers when a member pays an invoice.

{
  "invoice_id": "18230",
  "client_id": "7d5ee091717b8eb646…b8a1ab1a508",
  "created_timestamp": 1558977798,
  "organization_id": "6267",
  "event": "invoice_paid",
  "request_signature": "cccf5280523634…e3513c931d93"
}

invoice_updated

Triggers when a modification is made to an invoice (e.g., adding, updating, or deleting line items).

{
  "invoice_id": "18230",
  "client_id": "7d5ee091717b8eb646…b8a1ab1a508",
  "created_timestamp": 1558977798,
  "organization_id": "6267",
  "event": "invoice_updated",
  "request_signature": "cccf5280523634…e3513c931d93"
}

member_booking_cancelled

Triggers when a booking is canceled.

{
  "booking_id": "51216",
  "title": "Hot Desk",
  "workspace_id": "8850",
  "workspace_name": "Bike Room",
  "workspace_type": "Hot Desk",
  "check_in_timestamp": "1558990800",
  "check_out_timestamp": "1558996200",
  "check_in_datetime": "2019-05-27 21:00",
  "check_out_datetime": "2019-05-27 22:30",
  "member_name": "Jean",
  "member_last_name": "Example",
  "member_email": "example@example.com",
  "venue_name": "Vancouver Location",
  "venue_address": "123 High Street",
  "created_datetime": "2019-05-24 23:48",
  "client_id": "ce81e1fbf3d7…ba561d5d",
  "created_timestamp": 1545092451,
  "organization_id": 3568,
  "event": "member_booking_cancelled",
  "request_signature": "1207e01d133aa…4329c48ff0f"
}

member_booking_updated

Triggers when a booking is updated.

{
  "booking_id": "51225",
  "title": "Meeting Room",
  "workspace_id": "8744",
  "workspace_name": "Bike Room",
  "workspace_type": "Meeting Room",
  "check_in_timestamp": "1559084400",
  "check_out_timestamp": "1559088000",
  "check_in_datetime": "2019-05-28 23:00",
  "check_out_datetime": "2019-05-29 00:00",
  "member_name": "Jean",
  "member_last_name": "Example",
  "member_email": "example@example.com",
  "venue_name": "Vancouver Location",
  "venue_address": "1234 High Street, Vancouver",
  "created_datetime": "2019-05-27 16:56",
  "client_id": "ce81e1fbf3d7…ba561d5d",
  "created_timestamp": 1545092451,
  "organization_id": 3568,
  "event": "member_booking_updated",
  "request_signature": "1207e01d133aa…4329c48ff0f"
}

member_updated

Triggers when a user profile is updated.

{
  "member_id": "994",
  "account_id": 1700,
  "client_id": "ce81e1fbf3d7…ba561d5d",
  "created_timestamp": 1545092451,
  "organization_id": 6267,
  "event": "member_updated",
  "request_signature": "1207e01d133aa…4329c48ff0f"
}

new_checkin

Triggers when a user checks in to a location.

{
  "checkin_id": "5074",
  "location_name": "Vancouver Location",
  "location_timezone": "America/Vancouver",
  "check_in_timestamp": "1558987200",
  "check_in_datetime": "2019-05-27 20:00",
  "member_name": "Jean",
  "member_last_name": "Example",
  "member_full_name": "Jean Example",
  "member_email": "example@example.com",
  "created_datetime": "2019-05-27 17:20",
  "client_id": "7d5ee091717b8eb6461…a1ab1a508",
  "created_timestamp": 1558977616,
  "organization_id": "6267",
  "event": "new_checkin",
  "request_signature": "89e2f8ccca2d5…478888e7c5c2"
}

new_issue

Triggers when a user reports a new issue.

{
  "issue_id": "1091",
  "location_id": "3390",
  "category1": "wifi",
  "category2": "not working",
  "notes": "Wifi in the corner is spotty",
  "feeling": "na",
  "image": "https://s3.amazonaws.com/s3-large.jpg",
  "member_name": "Jean",
  "member_last_name": "Example",
  "member_email": "example@example.com",
  "created_datetime": "2019-05-27T17:29:12+0000",
  "client_id": "ce81e1fbf3d7…ba561d5d",
  "created_timestamp": 1545092451,
  "organization_id": 3568,
  "event": "new_issue",
  "request_signature": "1207e01d133aa…4329c48ff0f"
}

new_lead

Triggers when a new lead is added to an organization. It has 1 hour delay, and it won’t be triggered if a lead becomes an active member within that period.

{
  "venue_name": "Location 5",
  "member_id": "994",
  "first_name": "Jean",
  "last_name": "Example",
  "full_name": "Jean Example",
  "email": "example@example.com",
  "client_id": "7d5ee091717…b8a1ab1a508",
  "created_timestamp": 1558743024,
  "organization_id": "6267",
  "event": "new_lead",
  "request_signature": "2351968925…49200d7e2846"
}

new_member

Triggers when a new member is added to an organization.

{
  "venue_name": "Location 5",
  "member_id": "994",
  "user_id": "12346",
  "first_name": "Jean",
  "last_name": "Example",
  "full_name": "Jean Example",
  "email": "example@example.com",
  "client_id": "7d5ee091717…b8a1ab1a508",
  "created_timestamp": 1558743024,
  "organization_id": "6267",
  "event": "new_member",
  "request_signature": "2351968925…49200d7e2846"
}

member_deleted

Triggers when a member is deleted.

{
  "venue_name": "Location 5",
  "member_id": "994",
  "user_id": "12346",
  "first_name": "Jean",
  "last_name": "Example",
  "full_name": "Jean Example",
  "email": "example@example.com",
  "client_id": "7d5ee091717…b8a1ab1a508",
  "created_timestamp": 1558743024,
  "organization_id": "6267",
  "event": "new_member",
  "request_signature": "2351968925…49200d7e2846"
}

new_member_booking

Triggers when there is a new booking.

{
  "booking_id": "39553",
  "title": "Meeting Room",
  "workspace_id": "8733",
  "workspace_name": "Meeting Room C",
  "workspace_type": "Meeting Room",
  "check_in_timestamp": "1557464400",
  "check_out_timestamp": "1557468000",
  "check_in_datetime": "2019-05-10 05:00",
  "check_out_datetime": "2019-05-10 06:00",
  "member_name": "Jean",
  "member_last_name": "Example",
  "member_email": "example@example.com",
  "venue_name": "Vancouver Location",
  "venue_address": "1234 High Street Vancouver",
  "created_datetime": "2019-05-09 23:54",
  "client_id": "7d5ee091717b8eb…e8b8a1ab1a508",
  "created_timestamp": 1557446099,
  "organization_id": "6267",
  "event": "new_member_booking",
  "request_signature": "8ac4dc4765f1c07..728708e503bbd3"
}

new_plan_subscription

Triggers when a user or team’s subscription starts. E.g. if a user signs up to a new plan with the start date set 3 days from now, the webhook will trigger in 3 days time on that start date.

{
  "plan_template_id": "916",
  "plan_template_name": "Plan A",
  "account_plan_id": "29191",
  "name": "Plan A for Jean",
  "status": "ACTIVE",
  "subscription_type": "member",
  "created_datetime": "2019-05-27 17:25",
  "start_datetime": "2019-05-27 00:00",
  "created_unix_timestamp": 1558977946,
  "start_unix_timestamp": 1558915200,
  "price": "300.00",
  "deposit": "50.00",
  "set_up_fee": "10.00",
  "free_trial_days": "7",
  "subscribers": [
    {
      "user_name": "Jean",
      "user_last_name": "Example",
      "user_fullname": "Jean Example",
      "email": "example@example.com"
    }
  ],
  "client_id": "7d5ee091717…ab1a508",
  "created_timestamp": 1558977946,
  "organization_id": "6267",
  "event": "new_plan_subscription",
  "request_signature": "db2fdf29744b…d5d61dfed00"
}

new_sale

Triggers when a product sale is made.

{
  "product_sale_id": "102024",
  "product": "Small Coffee",
  "account": "1701",
  "account_name": "The Cube Team",
  "number": "100778",
  "user_name": "Richard Johnson",
  "invoice_item_name": "Sale of Small Coffee (#102024)",
  "description": "Product sale",
  "quantity": "1.0000",
  "unit_amount": "5.0000",
  "tax_rate": "0.08",
  "tax": "0.4",
  "total": "5.40",
  "notes": null,
  "created_datetime": "2019-02-01T03:45:27+00:00",
  "invoice_id": "298448",
  "invoice_number": "71312",
  "client_id": "ce81e1fbf3d7…ba561d5d",
  "created_timestamp": 1545092451,
  "organization_id": 3568,
  "event": "new_sale",
  "request_signature": "1207e01d133aa…4329c48ff0f"
}

new_team_member

Triggers when a user is added to a team.

{
  "team_id": 123123,
  "team": "The Cube Team",
  "user_id": 456456,
  "user_name": "Richard",
  "user_last_name": "Johnson",
  "user_fullname": "Richard Johnson",
  "user_email": "example@example.com",
  "is_admin": false,
  "client_id": "7d5ee091717…ab1a508",
  "created_timestamp": 1558977946,
  "organization_id": "6267",
  "event": "new_team_member",
  "request_signature": "db2fdf29744b…d5d61dfed00"
}

organization_token_updated

Triggers when the organization token is updated.

{
  "organization_token": "5c26d23356…3960870bfo",
  "client_id": "ce81e1fbf3d7…ba561d5d",
  "created_timestamp": 1545092451,
  "organization_id": 3568,
  "event": "organization_token_updated",
  "request_signature": "1207e01d133aa…4329c48ff0f"
}

plan_ending_soon

Triggers when a user or team plan subscription is about to end.

{
  "plan_template_id": "916",
  "plan_template_name": "Plan A",
  "account_plan_id": "29191",
  "name": "Plan A for Jean",
  "status": "ACTIVE",
  "subscription_type": "member",
  "created_datetime": "2019-05-27 17:25",
  "start_datetime": "2019-05-27 00:00",
  "created_unix_timestamp": 1558977946,
  "start_unix_timestamp": 1558915200,
  "price": "300.00",
  "deposit": "50.00",
  "set_up_fee": "10.00",
  "free_trial_days": "7",
  "subscribers": [
    {
      "user_name": "Jean",
      "user_last_name": "Example",
      "user_fullname": "Jean Example",
      "email": "example@example.com"
    }
  ],
  "client_id": "7d5ee091717…ab1a508",
  "created_timestamp": 1558977946,
  "organization_id": "6267",
  "event": "plan_ending_soon",
  "request_signature": "db2fdf29744b…d5d61dfed00"
}

plan_subscription_changed

Triggers when a user or team’s subscription is updated.

{
  "plan_template_id": "916",
  "plan_template_name": "Plan A",
  "account_plan_id": "29191",
  "name": "Plan A for Jean",
  "status": "ACTIVE",
  "subscription_type": "member",
  "created_datetime": "2019-05-27 17:25",
  "start_datetime": "2019-05-27 00:00",
  "created_unix_timestamp": 1558977946,
  "start_unix_timestamp": 1558915200,
  "price": "300.00",
  "deposit": "50.00",
  "set_up_fee": "10.00",
  "free_trial_days": "7",
  "subscribers": [
    {
      "user_name": "Jean",
      "user_last_name": "Example",
      "user_fullname": "Jean Example",
      "email": "example@example.com"
    }
  ],
  "client_id": "7d5ee091717…ab1a508",
  "created_timestamp": 1558977946,
  "organization_id": "6267",
  "event": "plan_subscription_changed",
  "request_signature": "db2fdf29744b…d5d61dfed00"
}

team_member_deleted

Triggers when a user is removed from a team.

{
  "team_id": 123123,
  "team": "The Cube Team",
  "user_id": 456456,
  "user_name": "Richard",
  "user_last_name": "Johnson",
  "user_fullname": "Richard Johnson",
  "user_email": "example@example.com",
  "is_admin": false,
  "client_id": "7d5ee091717…ab1a508",
  "created_timestamp": 1558977946,
  "organization_id": "6267",
  "event": "team_member_deleted",
  "request_signature": "db2fdf29744b…d5d61dfed00"
}

team_updated

Triggers when a team profile is updated.

{
  "team_id": "123123",
  "account_id": 1700,
  "client_id": "7d5ee091717…ab1a508",
  "created_timestamp": 1558977946,
  "organization_id": "6267",
  "event": "team_updated",
  "request_signature": "db2fdf29744b…d5d61dfed00"
}

Got questions?

We are here to help. Ask us a question and we’ll do our best to answer as soon as possible.

Contact Us

Using Webhooks

Webhooks are created based on events on the Optix platform. You can use webhooks to subscribe to specific events on the platform and inform URLs to be called when events occur.

To subscribe to webhooks, you need to add them in the settings file for your app. Learn how to do this in the App settings file section.

All webhooks are POSTED (POST HTTP method), using an HTTP form method, containing:

  • client_id: The app client_id. Available on the App’s details page on the admin dashboard
  • created_timestamp: Unix timestamp of the moment where the webhook was created
  • organization_id: ID of the organization where the app is available
  • event: The webhook name (check out the available webhooks)
  • request_signature: A SHA1 Hash of the current client_id + secret + created_timestamp (You can find the secret in the app details screen in ‘Apps → Develop → Your app’ in the Optix admin dashboard). E.g., client_id=123, secret=”secret”, and created_timestamp=123456 would be presented as sha1("123secret123456")

A complete list of available webhooks:

Webhooks list

A tool to help you debug webhooks:

Debugger tool

On this page

Webhook context

The primary purpose of a webhook is to notify the app about a change/event taking place on the Optix platform. The information received by the target of the webhook is a subset of the full data. We strongly recommend supplementing the use of webhooks with a query to the public API to retrieve the complete and most up-to-date dataset. This is particularly important if the target receives the webhooks out of order or after a long delay, where the data received may no longer be correct.

We do not guarantee the sequencing or delay time of webhook delivery. Typically the webhook is dispatched within 1 and 15 seconds after the event.

Retry policy

Each webhook request will be repeated until a 2xx (successful) HTTP response is received. 301 redirects will not be followed. A 410 response will force the webhook subscription to be removed, no other request will be sent to the endpoint regarding the same event (unless a new app is installed). Any other code will be logged as a failure, and the system will retry the request up to 10 times (with a delay of 10 minutes between each attempt).

The webhook system has a timeout of 5 seconds for connection and 2 seconds to receive the response. Any request that takes more time will be considered failed and will retry in the manner described above. You can use the Webhook debugger to identify problems during the development of your app.

Got questions?

We are here to help. Ask us a question and we’ll do our best to answer as soon as possible.

Contact Us

API Throttling

To promote a healthy environment, we implement API throttling. Your app’s requests will be subject to the following rules.

On this page

How repeat requests are handled

  1. Our API throttling is based on tokens. A single token can make no more than 60 requests per minute.
  2. The GraphQL API supports batch queries, but be aware that the request may be rejected based on the complexity (any request that could affect the performance of the server could be rejected).
  3. Every request will be replied to with request counters (remaining count, time for count reset) via HTTP response headers.

We suggest the use of local caches (on backend or frontend) for objects that you use frequently.

Got questions?

We are here to help. Ask us a question and we’ll do our best to answer as soon as possible.

Contact Us

Using the API

The Optix API is GraphQL based and designed to provide you with the best possible experience. To support the use of our API, we provide two useful tools: the GraphQL Voyager and the GraphQL Playground.

More information on GraphQL and why we chose it is available in the Optix and GraphQL section.

On this page

Authentication

Tokens are authentication keys and are always associated with an app. They are used to identify the caller and restrict the data available via API.

Tokens are made available in the following ways:

  1. On the ‘Develop → your app’ page in the Optix admin dashboard.
  2. Via a webhook, delivered when an app is installed by an admin.

Each kind of token provides a different schema:

  1. Organization token: Related to an organization, this token is intended for interactions NOT related to a user. Any interaction will be logged against the app, and all information retrieved will be based on the organization associated with this token.
  2. Personal token: Related to a user, this token is intended for interactions on behalf of a user. Any interaction will be logged against the user, and all information retrieved will be based on the user/member/organization associated with this token.

Note

All tokens will expire from time to time. You should subscribe to the webhook “organization_token_updated” and update the token when you receive that webhook. You can find details on what to expect in the webhook here.

We support the Bearer authentication scheme, so you can do one of the following:

  1. Include the header Authorization: Bearer TOKEN.
  2. Add URI query parameter access_token=TOKEN.
  3. Set body parameter access_token. This only works for POST requests with either application/x-www-form-urlencoded, or application/json Content-Type.

Note: Make sure to access the Optix GraphQL API using a valid access token, otherwise you will not see the full schema.

Tip

Organization tokens always end with an ‘o,’ while personal tokens always end with a ‘p.’

GraphQL Voyager Tool

This tool provides a map of all objects available to you. You can navigate and read the documentation for each field, and also visualize the connections between objects.

Launch Voyager tool

You can also access the Voyager through the link provided in the ‘Develop’ page of the Optix admin dashboard, using the organization or personal token menu item:

The menus in the admin dashboard in ‘Apps –> Develop –> your app’ where you’ll find links to launch the Voyager tool with your tokens pre-filled.

GraphQL Playground

This provides a debug tool and documentation during the creation of a GraphQL query. Feel free to explore all the objects and test out all the parameters available. Click ‘Docs’ on the right to pull out a section where you can find information to help understand each object. This demo allows you to read (‘Query’) data, but writing (via ‘Mutations’) is blocked.

Important

This tool provides different results depending on the token provided. It reads from our current public APIs (using GraphQL introspection) and provides the most up to date documentation possible.

Example

This example is a query that fetches the name and email of the currently logged in user. Click the play button to run it. You could try adding a new line after email and adding user_id to get a feel for how it works. You can also open this example in another tab if you like.

Hidden on mobile

This tool doesn’t fit on screens this small. Please use a browser which is a bit bigger (you could try rotating your phone).

In the above example playground, mutations (writing to the API) are disabled.

You can also access the playground through the link provided in the ‘Develop’ page of the Optix admin dashboard, using the organization or personal token menu item:

The menus in the admin dashboard in ‘Apps –> Develop –> your app’ where you’ll find links to launch the Playground tool with your tokens pre-filled.

Got questions?

We are here to help. Ask us a question and we’ll do our best to answer as soon as possible.

Contact Us

Building Your First App

This page contains a step-by-step guide to get started.

It’s worth reading the overview page before jumping right into creating an app.

On this page

Getting started

Step 1

Log in into your Optix admin dashboard (yoursubdomain.optixapp.com). If you don’t have an Optix organization, contact us.

Step 2

Look for the item Apps → Develop, on the left-hand menu. If you are not able to see this link, get in touch with our support team to enable the option.

‘Develop’ menu item on the Optix admin dashboard

Step 3

Click the Create App button.

All apps for Optix must include a reference, which is created in an Optix organization. The app reference serves as the basis for the app details, the authentication tokens you can use to develop, and the app settings where you subscribe to webhooks and specify canvases for your UI.

Step 4

A window will open. Enter the app name and click the Create button.

‘Create app’ modal on the Optix admin dashboard

Step 5

A new app has been created and installed. A page will display details related to your new app.

The details in the section at the top (i.e., ‘category’ and ‘link’) are only required if you want to share your app with other organizations. If you do want to make your app public, please get in touch with our team.

The same page will present you some keys and tokens, as shown in the sample below:

Your app’s keys and tokens.

The Client ID never changes. It will be used to identify your app in the Optix system. The Secret is used to create signatures on webhook requests. The Organization and Personal tokens are generated automatically for your organization and currently logged in user.

Important

You will never be able to see tokens related to other venues in your dashboard. In the case where an app is public and is installed by an admin of another organization, Optix generates a new organization token, then submits this new token via a webhook (only if your app has registered to the “app_install” webhook).

Personal tokens can change at any moment, so you should never store them in your app. They will be shared with your app via URL parameters each time a canvas is displayed. Learn more about this in the Contextual parameters section

The menu located next to the token allows you to access the GraphQL Voyager, GraphQL Playground, and Webhook debugger. You can also copy and regenerate some tokens.

Overflow menu containing links to launch useful tools pre-filled with your tokens

The advanced settings file can be used to register the webhooks and canvases of interest by your app. Check the section Settings file to understand the file format.

Settings file section

Step 6

Create your app’s code either from scratch using the technologies of your choice, or using the boilerplate detailed below.

App boilerplate

Building an app for the first time can be time-consuming. A boilerplate could speed up your first few steps. We provide a PHP Laravel boilerplate, you will find it in this repository.

The README.md contains instructions on how to start the project and set up the configuration on the app configuration page.

Got questions?

We are here to help. Ask us a question and we’ll do our best to answer as soon as possible.

Contact Us

App Example

Mobile users and admins can interact directly with apps using canvases. Alternatively, apps can be set up to leverage webhooks and other data from the Optix API without introducing new UI to the mobile app or admin dashboard. Apps can actively retrieve information from the Optix platform querying or mutating data via an Optix Platform GraphQL endpoint.

Each app can use different features and resources. The following is an example of how we can think about building an app that uses all three of the available technologies: webhooks, the API, and canvases.

On this page

Example app: Door access control

To describe the features of the ecosystem, we will use an example of an integration with an existing door access control system.

This hypothetical app’s primary purpose is to connect a third party system that electronically controls door locks. This app will allow a coworking space’s members to get into a room they booked using the Optix mobile app. This app will also notify the admin when any bookings are scheduled outside of the opening hours.

The requirements for this app are:

RequirementsSolution

As an admin, I receive an email if a booking’s start or end time occurs outside of the venue opening hours

When the user creates a new booking, a webhook is triggered that targets an endpoint in the app. This endpoint verifies the new booking by making a call to the Optix API bookings object. If the start or end time is outside of the opening hours, the app will send an email to the venue admin.

As an Optix mobile app user, I can click a button on the home screen, which opens a full-screen experience to allow me to unlock doors that I have permission to unlock

The app will include an HTML user interface that lists available locks, including an ‘unlock’ button.

To display this interface inside the iOS/Android mobile app, it will specify in the app settings that it wants a canvas to appear on the home screen, using the MOBILE_HOME_PRIMARY canvas.

When loaded in the Optix user app, the URL specified has the User’s token appended to it. You can write Javascript code to retrieve all the data related to that user’s bookings, via the public API.

This data empowers the app to display only the locks that the user has permission to unlock, i.e., locks for doors that are linked to the room they just booked.

Design

Below is a mockup of how the app could look. You can see the button that launches the canvas from the mobile app home screen, then the canvas containing the app’s UI on the right

Got questions?

We are here to help. Ask us a question and we’ll do our best to answer as soon as possible.

Contact Us